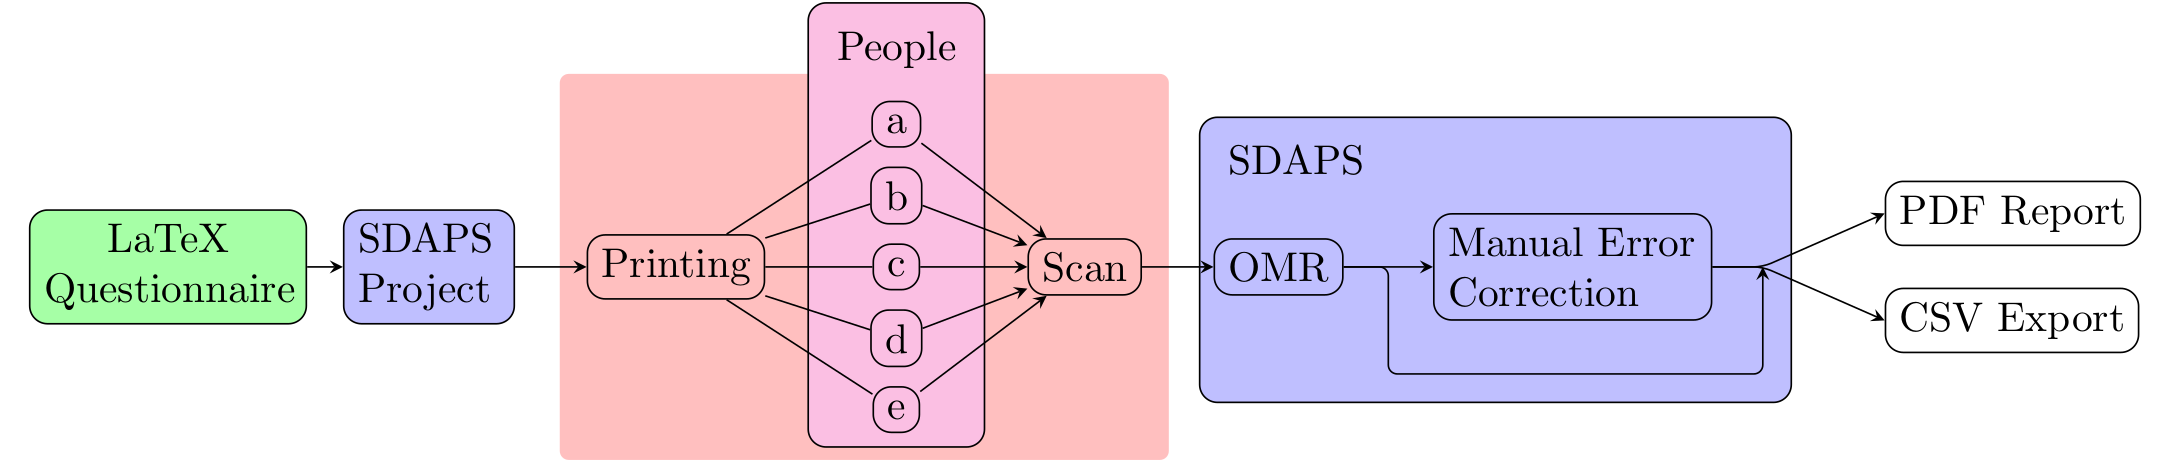
Adding Scans to a Project
Trying it without a printer/scanner
If you do not have a printer and scanner available, you can use the following files instead:
You will need to unpack the zip file. The contained directory is a prepared
SDAPS project directory as created in the setup step. Use this directory
instead of /tmp/project for the commands.
You can add scans to the survey directory that was created earlier. This is
done using the add command. SDAPS uses .tif files as default for add,
so you need to add the option --convert, if your scanner (like most of them)
give you pdfs:
$ sdaps add /tmp/project --convert example-scan.pdf
----------------------------------------
- SDAPS -- add
----------------------------------------
Converting input files into a single temporary file.
~/example-scan.pdf: Not a TIFF or MDI file, bad magic number 20517 (0x5025).
Processing /tmp/sdaps-convert-abc123.tif
Done
If everything worked fine you will see no further output. The new scan is
copied into the project directory as 1.tif. If you used --convert then this
is a monochrome version of the scan.
You can repeat this step if you have multiple scans.
Attention
Do not remove or modify the copied TIFF files. SDAPS stores information that references these files (i.e. it creates a record for each page). If you accidentally added a file, you can recreate the project and start from scratch.
If you run into errors, because of the page count of your pdfs, take a look at “Multipage Answer Sheets”.
Overview
The following topics are covered: