Printing and Scanning
Trying it without a printer/scanner
If you do not have a printer and scanner available, then you can skip ahead to the “Adding Scans to a Project” section. There are download links that allow you to try the rest of the commands.
Printing
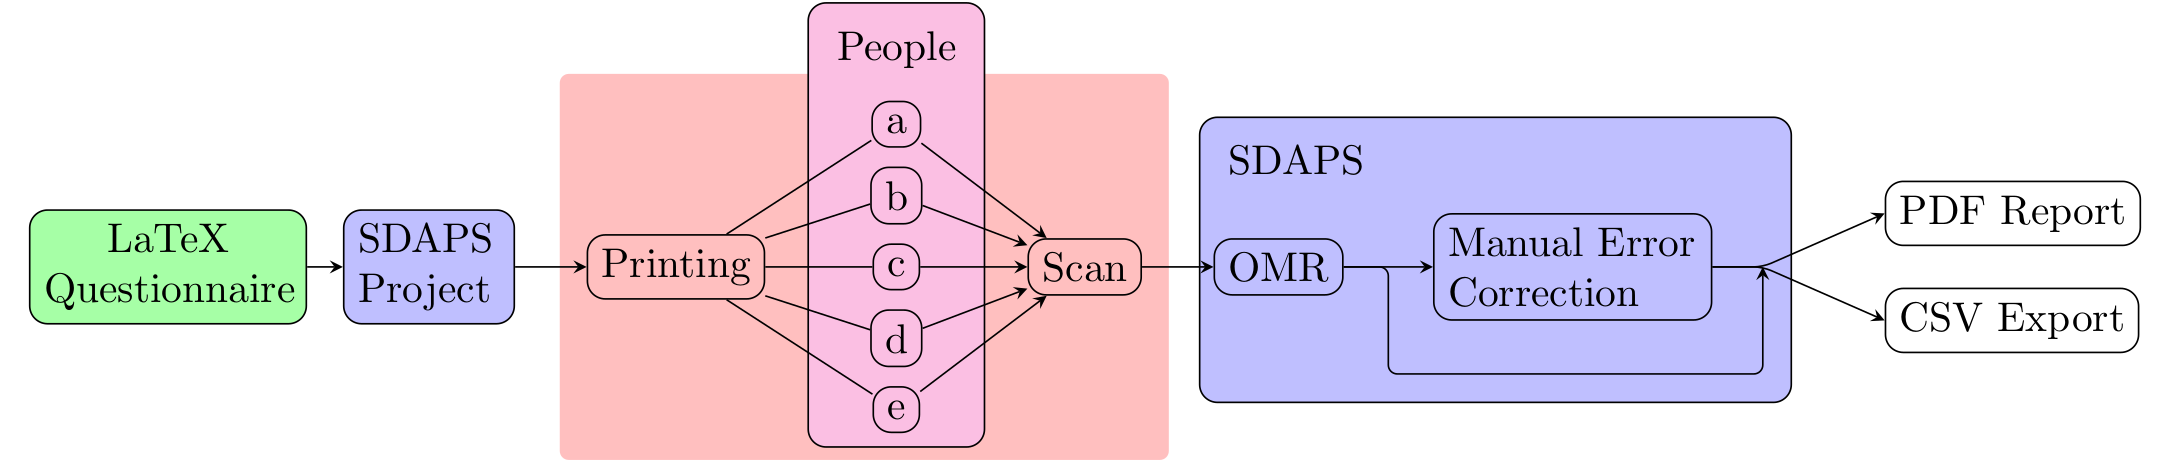
After the setup of the example we now have a questionnaire.pdf in the project directory that can be printed. This depends on the setup of the survey (done using the documentclass options in the LaTeX document). If we make each printout unique using a “Questionnaire-ID” then we would need to use the “stamp” command to create the printable questionnaire. Please refer to the section at the bottom of the page for more information.
Simply print the created PDF file using your favorite PDF reader. It is a good idea to disable any “scale page to fit printable area” option. Also, you should not staple the papers together.
Scanning
After you have a couple of printed and filled in questionnaires you need to scan them. There is a whole scanning section about this. Please have a look there.
In general, you should make sure that the quality of the scan is good. A few things to keep in mind:
- A resolution of 300dpi is ideal
- Scanners may be dirty, it can help to clean them
- Corners should not be folded or similar so the marks are detected
- Simplex (one sided) surveys should still be scanned in duplex mode
SDAPS natively uses monochrome TIFF files. But PDF files as they are generated by modern copiers can be converted automatically. Most likely, a scan produced with the default settings on modern copiers will work.
We have prepared an example scan which you can use together with the prepared example project for the next steps.
Overview
The following topics are covered: